Frequently Asked Questions
How To: Add an Exchange account on an iOS device
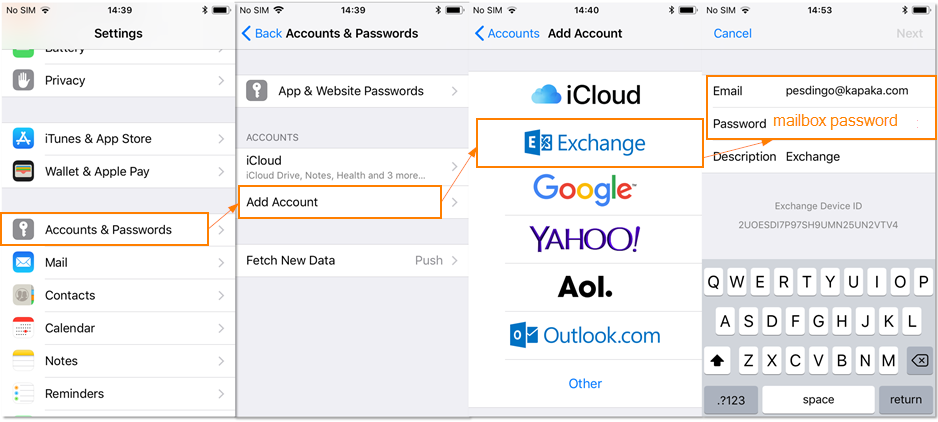
1. For iOS 14 or greater: Go To Settings > Mail > Accounts > Add Account
For iOS 12/13: Go To Settings > Passwords & Accounts > Add Account
For iOS 11: Go To Settings > Accounts & Passwords > Add Account
For iOS 10: Go to Settings > Mail > Account > Add Account
2. On the Add Account screen, tap Microsoft Exchange.
3. Enter your full email address and enter a description (such as [company name] Email, and tap Next.
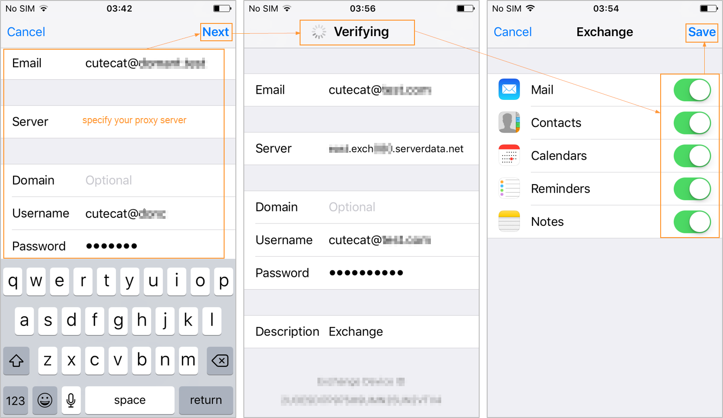
4. The device will try to configure the Exchange server address automatically. If the server address can’t be determined, you will be asked to enter it.
Please call us at (209) 790-4560 or submit a support request if we can be of any assistance setting up your iOS device.
For iOS 12/13: Go To Settings > Passwords & Accounts > Add Account
For iOS 11: Go To Settings > Accounts & Passwords > Add Account
For iOS 10: Go to Settings > Mail > Account > Add Account
2. On the Add Account screen, tap Microsoft Exchange.
3. Enter your full email address and enter a description (such as [company name] Email, and tap Next.
4. The device will try to configure the Exchange server address automatically. If the server address can’t be determined, you will be asked to enter it.
- Server name: Enter the server name provided by your Support Agent.
- Domain: if your iPhone is on iOS 12 or higher, type in your Exchange domain provided by your Support Agent. If it's on iOS 11 or lower, leave it blank.
- Username: Enter the username provided by your Support Agent. You can also find this information by logging in to the My Services tab at https://myservices.ntelogic.com and clicking on ActiveSync.
- Tap Next
- By default, Exchange ActiveSync pushes new data to your device as it arrives on the server. If you prefer to fetch new data on a schedule or to only pull new data manually, go to Settings > Fetch New Data to change the settings.
- To change how many days worth of data is synced to your device, go to Settings > Mail > Account, select your account. The default setting is three days.
Please call us at (209) 790-4560 or submit a support request if we can be of any assistance setting up your iOS device.
Last updated 04/29/2025 6:53 am
Please Wait!
Please wait... it will take a second!